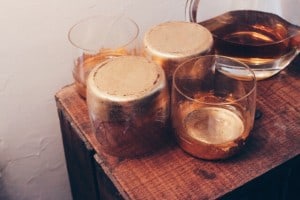
If you’re like me, Drake is always coming up to you like “Oh you fancy, huh?” and you’re always like, “I’m so fancy, you already know.” Also, you’re probably like, “Wes, I’m terribly fancy but also I’m what they call ‘underemployed’, aka it’s hard to be so fancy when sometimes you just eat old bread for dinner.”The thing is, you still want to elicit extreme jealousy from everyone who walks into your home, right? That’s where I come in. Here is a simple DIY aka Fancy Craft that will secure your place as Queen of Luxe.
This particular project came about because I decided I wanted a real Mad Men-esque bar. I wanted it, and now I have it. #Feminism
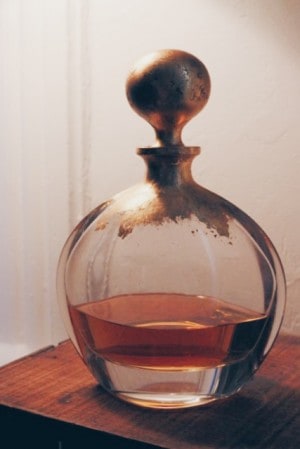
The inspiration for a decanter was this brass/glass beauty, but at nearly $200…yeah right. The decanter I ended up getting was a plain glass number from Kitchen Stuff Plus ($40). The glasses are from CB2 ($3/each).
How to Make Your Own Gold Leaf Bar Set
Time: Approx. 3 hours over 2 days
Cost: Gold leafing supplies – approx. $30; glassware – variable (mine were about $50 all told)
Supplies: Booklet of gold leaf, Mona Lisa Metal Leaf size (adhesive), 2 medium-ish brushes, Gamvar oil-based picture varnish (all available at an art supply store), glasses/decanter
NOTE: The glue/varnish is not food safe, nor is it dishwasher/microwave compatible. Gild only where it will not come in contact with the liquid or your mouth/face!
1. Wash your glass, dry thoroughly.
2. Using one of the brushes, apply a thin layer of size where you want the gold leaf to go. We went for a more rough edge, but you could use painter’s tape if you wanted a clean line. If you mess up, wipe it off! Dat gold leaf will stick to the smallest amount of glue.
3. Allow to dry for 30 minutes. This makes the glue tacky, but not wet.
4. Using clean, dry hands, carefully lift a sheet of gold leaf and place it on the sticky part. Using the other (clean, dry) brush, press down gently over the leaf and smooth it into position. The leaf is surprisingly forgiving, so don’t worry if it tears. Small pieces can fill in small areas. Also, I recommend trying this on a wine bottle or other spare glass first, just to get the hang of it.
5. Continue to gild until all the size has been covered. Use the brush to dust away any little bits of gold. In case you hadn’t figured it out, this is all best done over top of some newspaper or drop sheet. The little gold sprinkles are pretty, but they WILL get everywhere.
6. Allow the leaf/size to dry overnight.
7. You’re back! And everything is dry! Perfect, time to varnish. Using a brush, apply a very thin layer of varnish wherever the leaf is. It’s not a huge deal if it spills over onto the glass, but you will see it. A little goes a long way though.
8. Allow that to dry for at least one day or until the varnish is no longer tacky. Give them a gentle rinse and they’re ready to use!
NOTE #2: Keep in mind that glass is not the ideal surface to try and glue stuff to – these need to be handled with a certain degree of care. The leaf can be scratched off fairly easily, so they’re not like, milk-with-breakfast-everyday kind of barware. Display and use for fancy parties, you dig?


 Follow Us On Instagram
