Good morning fellow home owners/leasers/renters/squatters. Coming to you from one sunlit and breakfast-strewn nook, there is one pressing matter in the world of home dwelling this morning.
Plants! – A step-by-step guide to starting an in-house garden.
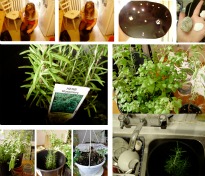
An adventure has begun to unroll here on College Street, and its name is botany. The plantlife have chosen their homes – an old metal trash can, an Arizona can cut in half, a Big Gulp, a half-pint ice cream container, and some assorted other plastic contraptions, all lovingly perforated with 1/2″ holes in the bottom (water flow!).
So step one: Choose plants, poke holes.
A hammer and nail will do nicely for tougher surfaces, an emphatically-thrust pencil could do for others.
Step two: Name plants.
As we know, plants with names receive better care. Rosemary is my rosemary plant, the lemon balm is Lemony Snicket, the spider plants are Peter Parker and Tobey, the mint is Minty Sedgwick, the sage is Oliver and the Umbrella plant is Francie Nolan. These are just examples.
Step three: The soil.
You can buy a bag of whatever suits your fancy from your local green grocer, but it’s important to amp it up. The very nice lady at Milk & Things suggested these little fertilizer sticks – they look like Pop Eye cigarettes and you stick one in every sixty days. Done. Also, if you have access to cows or compost, you’re in luck. Plants love rolling around in cow poop, and decomposed matter for that… matter. Turn a little compost or dried manure into your soil every now and again to make it really poop! I mean pop!
Step four: Get glamorous.
Just like humans, plants need a little je-ne-sais-quoi before they willingly settle into a new environment. A little pampering, a little foresight, a little oomph. And whether for you this means pretty little stones and a terra cotta planter, special garden trinkets to scatter about the soil, or just some balled up newspaper, you have to find a way for the water to trickle down real nice. So, before you pop your greenery into their new homes it is important to prepare the way.
Step five: Drainage!
A couple stones are a good idea, shredded newspaper is too. Just give that dirt a little somethin-somethin underneath. The plants in the sunroom are on a strict diet of last week’s NOW magazine and some seashells from last year’s Dalhousie tour de force, plus any little stones found around Toronto, Ontario (so, one stone so far).
Step six: Get drrrrrrty.
When in the pursuit of foliage, it’s important to get your hands dirty. This is not a figurative statement. It is a very, very good idea to get in tune with your new plant friends by sticking your hand as far into the dirt as possible. Wriggle your fingers around a little, feel up the roots. You’re not taking advantage of anything, you’re gathering the information you need to take good care. Is the dirt warm? (It’s better for most plants when it is, cold wet dirt = mould) Is the dirt too dry? It’s unlikely that it is, if you water like most. But it’s always good to check.
Step Seven: Cherish.
The only other really worthwhile tip worth tipping is to care for your plants with the same love and adoration you would any cherished friend. Introduce your houseguests to them. Pluck the undernourished-looking leaves, as well as the bully leaves who are hogging all the sun. If you catch yourself sometimes thinking about your plants when you’re out, it’s totally okay. You’re still cool. Just weird cool.
By Annie Webber


 Follow Us On Instagram
